
Praetorian recently finished a tour de force at Hack Space Con, providing paid training, a workshop, and three talks:
- Training: “Bridging the GAP: An Introduction to Offensive IoT Security from Serial to Bluetooth”
- Workshop: “Breaking the Bot: GenAI Web App Attack Surface & Exploitation”
- Talk: “Fortune 500 Red Team Initial Access – Why not just ask for it?”
- Talk: “Scrappy SAT Snooping”
- Talk: “Domain-Wide Domination: Creative Paths from GCP to Complete Domain Compromise”
The entire Praetorian team had a blast at the conference, sharing our knowledge with the security community and making many new friends.
HackVapeCon
Before the conference started, four members of Praetorian’s Internet of Things (IoT) team delivered their “Bridging the GAP” course on IoT security. On the second night of the conference, the IoT team members were talking in the hotel bar, joined by a student of our training course and a member of the Praetorian Red Team. During a lull, we noticed that the Red Teamer’s vape was peculiar: it had a screen and a USB-C charging port. The presence of USB-C suggested the possibility of sending data to or from the vape. Our curiosity piqued, we did what any reasonable group of IoT hackers would do: took apart a coworker’s vape at a hotel bar, surrounded by curious on-lookers.
The previous owner of the vape graciously gave the IoT team members the vape to hack, and we set about using the tools at hand to take it apart. The IoT team had some tools with us at the conference, but they were far from the full suite of tools we usually use during IoT security assessments. A theme throughout the vape hacking was making do with the tools we had, creatively combining them to achieve various goals such as disassembly, connectivity, and interfacing with the electronics onboard.
The target was Raz Vape’s RAZ DC25000:

The screen features art, information on the mode, battery level, and puffs remaining. The bottom features a USB-C connector.
Our initial goal: Could we use a vape plugged into a computer to install malware?
Physical Tear Down
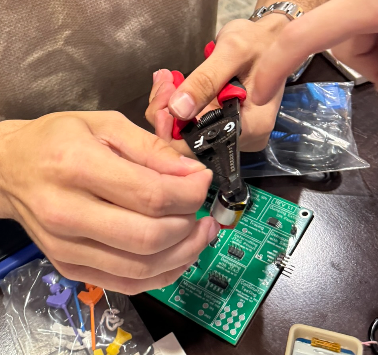
The vape’s body had only two seams: along the long side in the picture above and along the bottom. Using our iFixit teardown kit, Praetorian pried the bottom plastic off. Extracting the electronics required using makeshift pliers to pry on the USB-C connector, which partially destroyed it in the process.
The electronics consisted of three parts:
- A screen
- A primary PCB
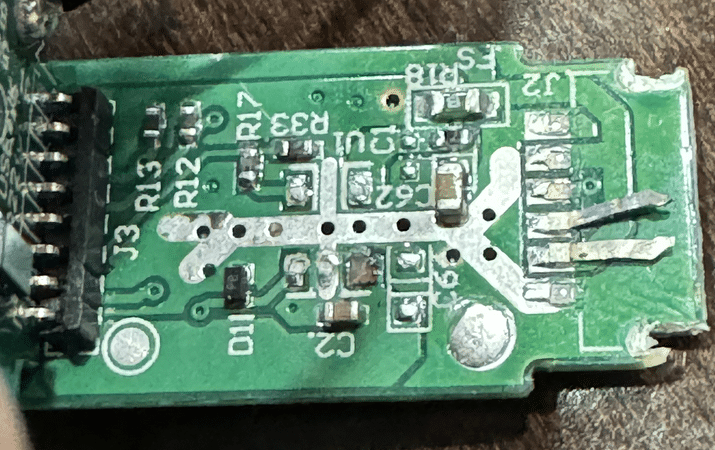
- A daughter board primarily used for the USB-C connector
Hardware Reverse Engineering and OSINT
With the vape disassembled, some team members went looking for additional students of the training, as this was a great way to reinforce what they had learned. The rest started to reverse engineer the device’s hardware to learn more about how it operated. Each team member took their own photos for reference and dove into reverse engineering.
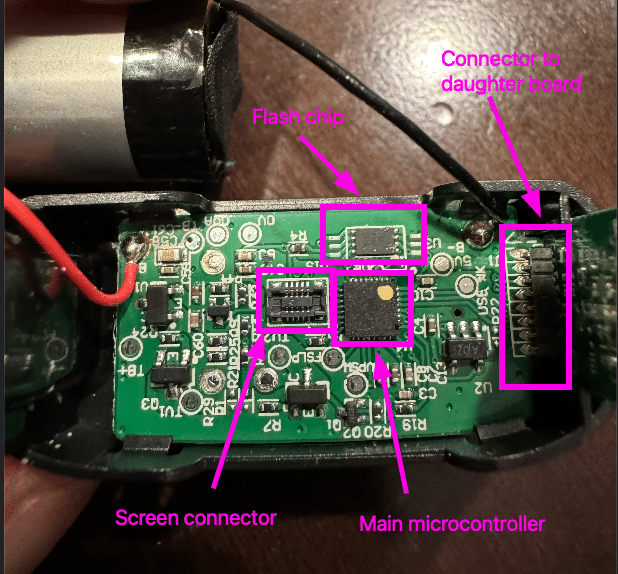
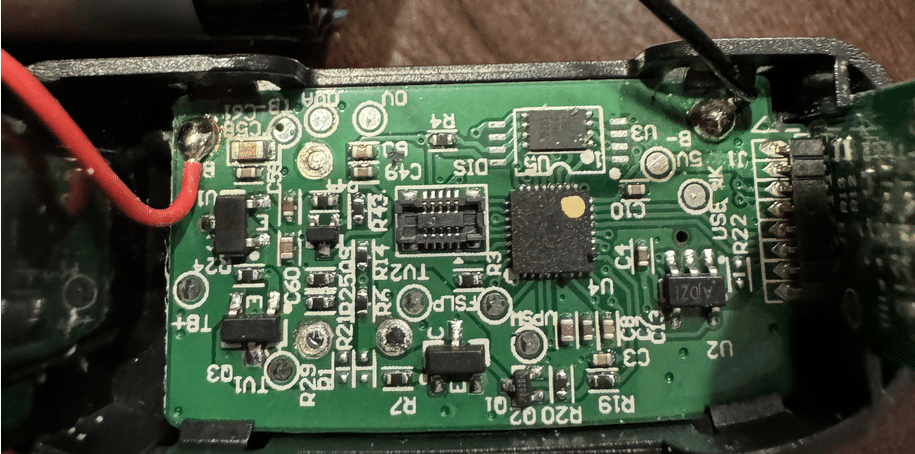
The microcontroller is the Nations N32G031, an ARM Cortex-M0 chip with no USB or radios. The flash chip likely contains the images used by the screen. The screen connects to the board at the identified connector.
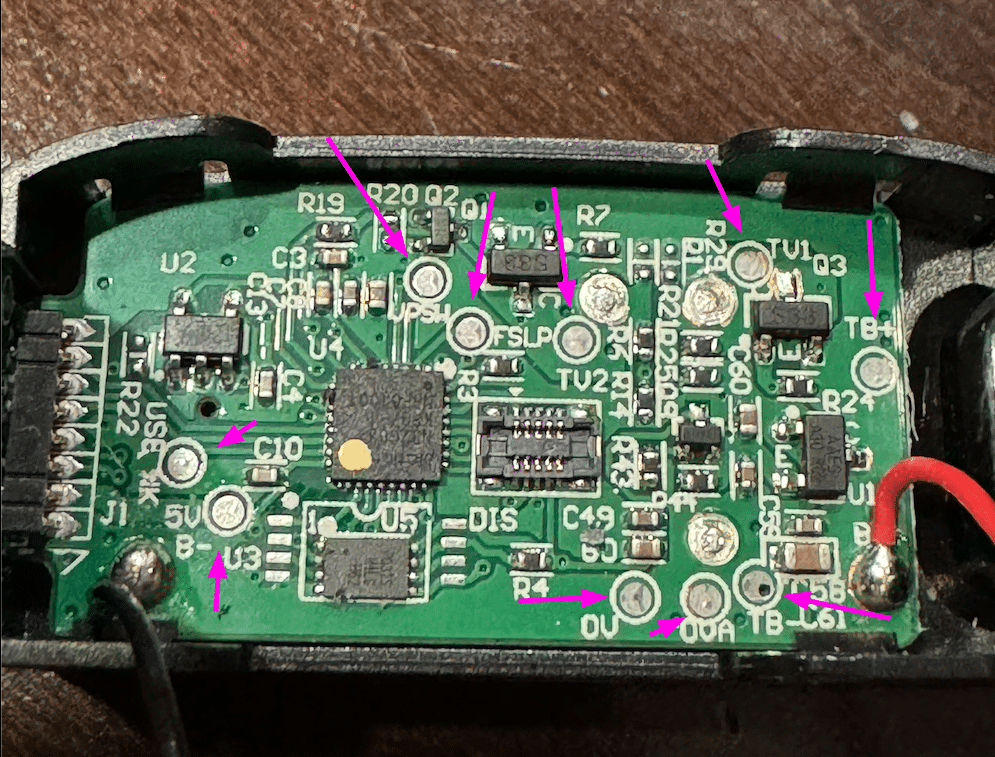
The board has many test points, the large silver flat circular areas seen in the image below. Test points are often used during product development and testing as easy ways for engineers to access certain pieces of information or data buses.
The available tooling made connecting to these difficult, but Praetorian discovered that none of the test points were necessary to hack the device.
In addition to physical reverse engineering, Praetorian performed open source intelligence (OSINT) on the target and the microcontroller. While researching the target, we found that some other people had performed prior reverse engineering on earlier versions of this product. In one article, the hacker got Windows 95 icons to run on the vape’s screen.
Simultaneously, the student of our training used the skills we taught to find the microcontroller’s datasheet, which revealed a few interesting things:
- The pinout of the chip, which tells us what each pin on the microcontroller is used for
- The chip used Serial Wire Debug (SWD) for programming it and was likely still in use
- The chip cannot talk USB.
The chip’s lack of USB support meant that our original goal of infecting machines with vape-delivered malware was likely not feasible, at least not at a bar table. The microcontroller could not speak to the attached computer even if you plugged it in. Praetorian changed the goal to get the firmware and see how we could change the images. Thanks to the blog post above, we knew that changing the images was possible. But could we get the firmware?
The Serial Wire Debug (SWD) protocol is an ARM-specific protocol used to put firmware on devices and debug them. It is a potent protocol that allows full control of the microcontroller, equivalent to having root access in Linux. Frequently, finding it is a top priority once a microcontroller is determined to be based on ARM, as it will also allow you to dump the device’s firmware.
Praetorian used the pinout to determine where SWD was and traced the pins to discover they were pins 3 and 4 of the daughter board’s connector.
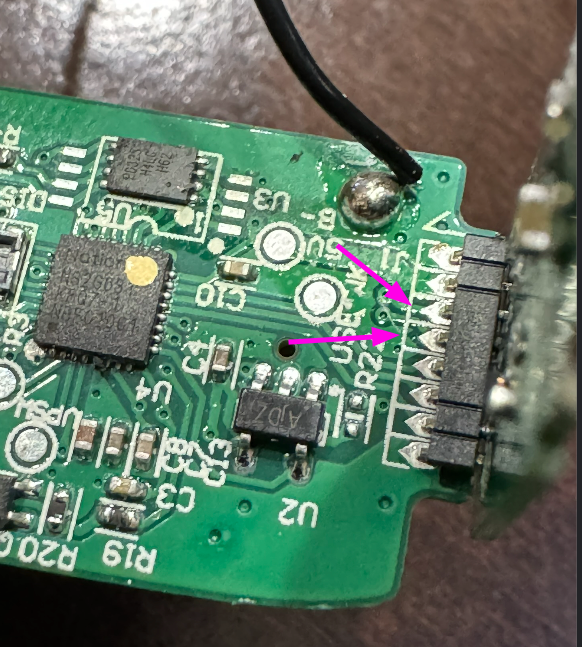
If we could connect our tools to these pins, we would be able to interact with SWD and thus dump the firmware. We didn’t have a soldering iron or a magnetic base for our trusty PCBites, but could we find another way to connect to the pins?
Bar Stools and Makeshift Tools
The IoT team members spent the next hour trying to get a consistent electrical connection to the SWD pins. Our tools included a full set of DuPont wires, a set of hooks / micro grabbers, a multimeter, a debugger, and a Flipper Zero. Surely that would be enough!
The hooks / micro grabbers work by pulling back a plastic sheath to reveal curved prongs that can latch onto a pin or connector. These are good for quick and dirty connections, which is about as good as we’d get on a bar table. Unfortunately, there was a moderate chance of bridging two connection points, so for much of the testing, we had a rule of “no one can touch the wobbly bar table except the person making the connections.”
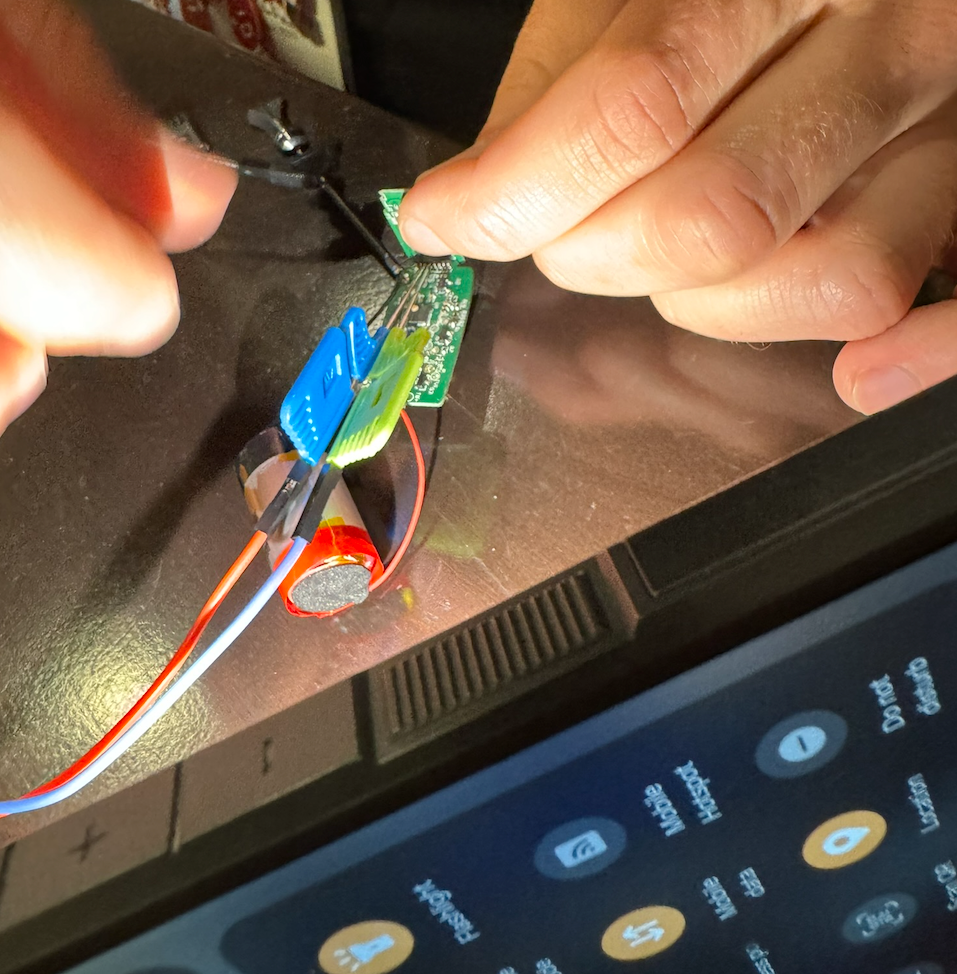
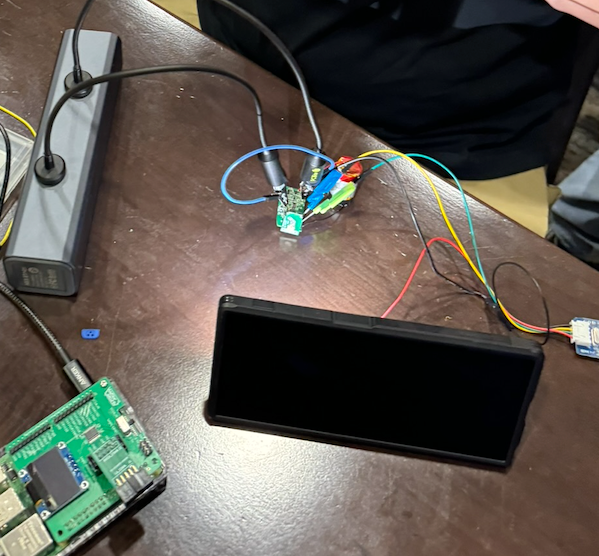
The above image shows roughly the amount of space we had to work with to prove out our connectivity. The black probe is connected to ground, the blue probe is connected to one pin of SWD, and the green probe is connected to the other pin of SWD.
Once we thought we had connectivity, we used a Flipper Zero to quickly test if SWD was enabled, using the SWD Probe app.

Not only did the SWD Probe suggest that SWD was enabled, this also marked the 7th time in history where someone used the Flipper Zero for hardware purposes.
Knowing there was likely active SWD, we needed to hook the vape up to a tool that could interact with SWD: a debugger. A debugger would allow full access to the microcontroller’s memory and execution, so it is a high-value target during reverse engineering. A team member had a personal J-Link on hand, and this was used to attempt to dump the vape’s firmware.
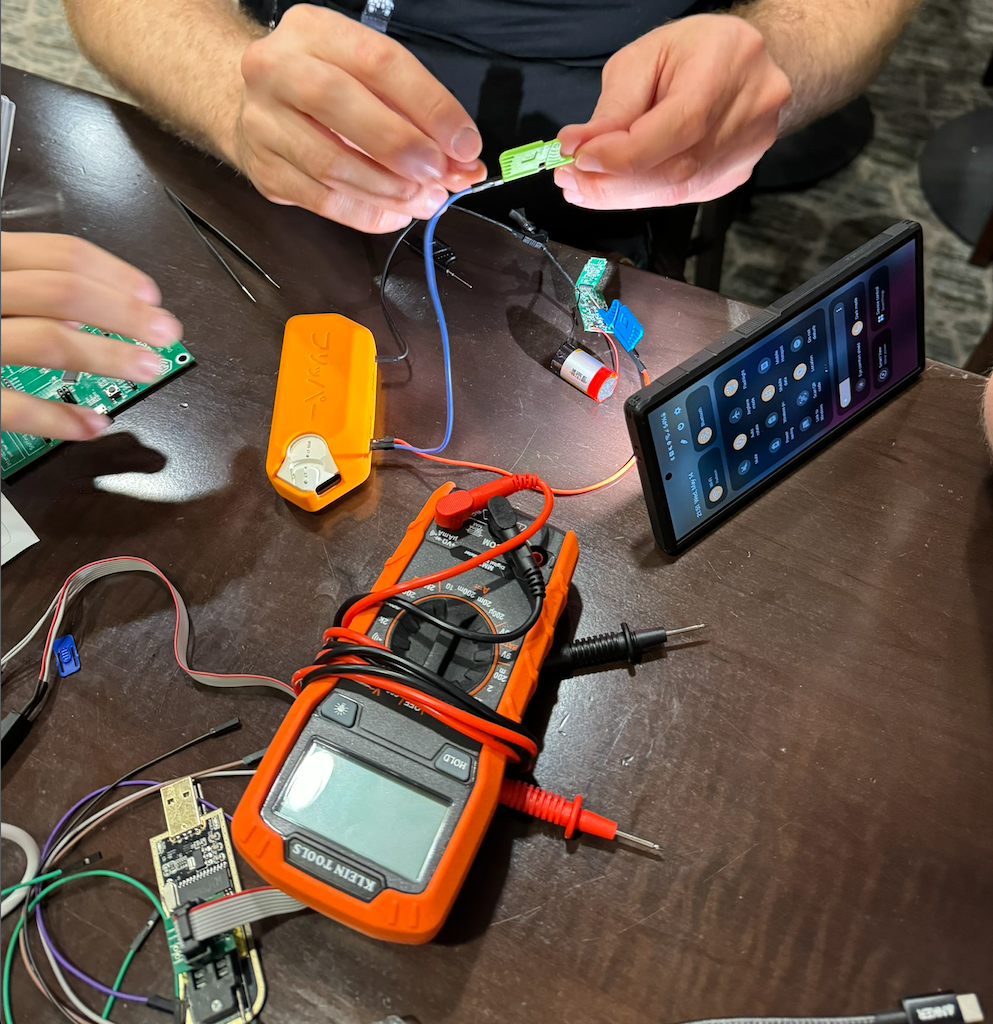
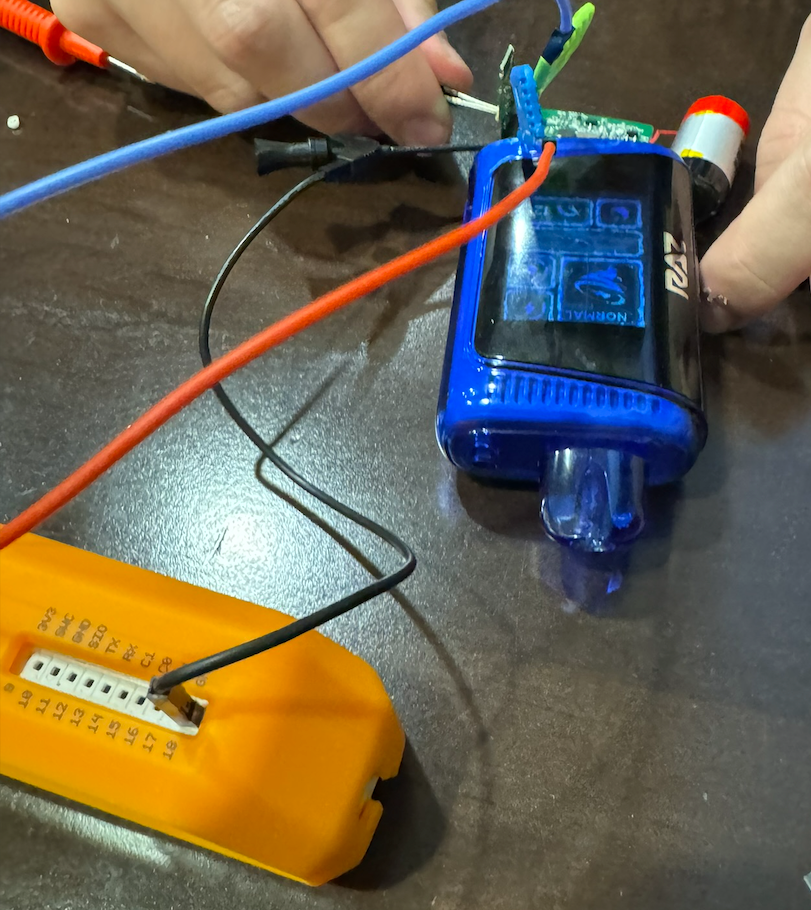
Initial attempts at dumping the firmware over SWD were unsuccessful, due to insufficient connection quality. Using the tools on hand, we tried many things to improve the connection, including PCBites attached to a magnetic screwdriver case and bodging a USB cable tester into test points. At this point, the Praetorian Red Teamer who provided the vape acquired a second one just to test the USB-C connection.
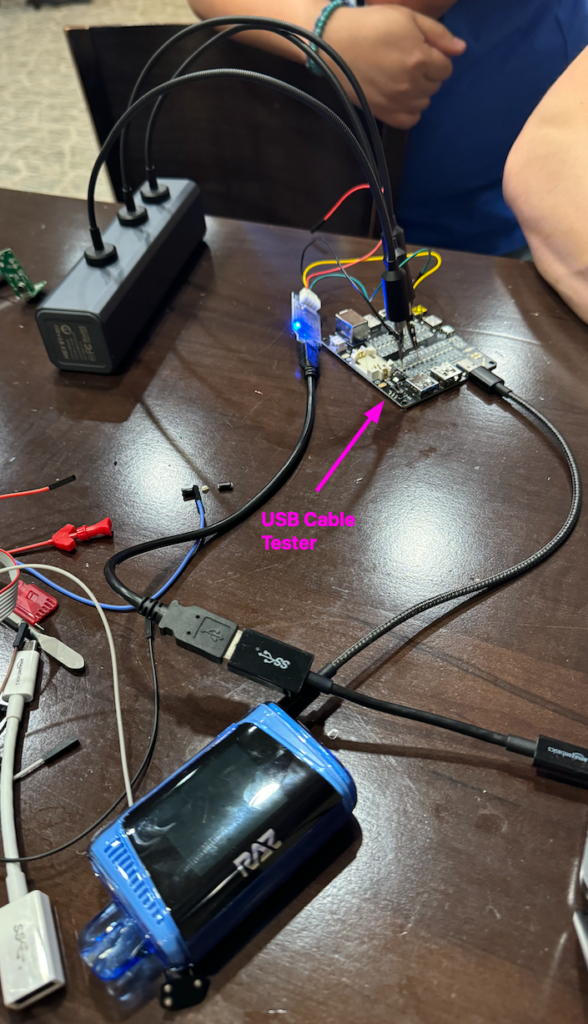
The USB cable tester was hooked into the vape, the batteries were removed from the tester, and the pads were used to connect to the debugger.
None of these approaches worked.
The datasheet suggested we needed to put the chip into reset prior to getting full SWD. On this chip, when the Reset pin was low, the chip would be restarted. But we observed that a resistor was pulling the Reset pin high. We could pry the resistor off, but that risked the chip never booting again. If we could temporarily pull the pin to the ground, overriding the resistor, we would get the chip into reset, which could allow SWD access. Without proper tools, we bridged the connection to ground using all of the hands we could, and attempted to connect to SWD.

This, too, did not work.
We thought we needed to find a way to have the microcontroller be in the reset state. Our bodged approach of manipulating the board was not working. We knew that if the microcontroller was powered off and was then powered on, it would be in the reset state.
Going back to the drawing board, the Red Teamer suggested we cut the battery. Until now, we were very hesitant to perform “one-way” modifications. Normally, our proper tools would allow us to work around most modifications of this sort, but with the tools at hand, any such modifications risked ending the project. However, with most other options exhausted, it was time to cut the battery.
Vape Firmware After Dark
With the battery cut, we were able to hook our debugger directly to the vape to provide power. Previously, we had only connected the ground and the data pins, but powering the device from the debugger was the key to a successful connection.
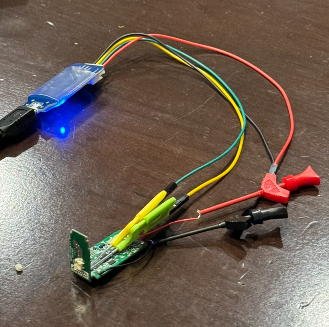
At 11:54 PM, Praetorian successfully connected to the vape and dumped the firmware. At this point, a crowd had formed, possibly drawn by the cheers, so while some of us validated the dump and started the firmware reverse engineering process, the rest of us explained to the crowd how we were able to dump the firmware.
Being able to dump the firmware meant we could also overwrite it. What sort of things could we do? With no radios or standard connectors, the device’s potential security impact is low. We could overheat the device with custom firmware. Or we could add images to the screen. Could we add simple games that use the button and puffing as controls?
After reviewing the firmware, we were able to see some interesting sections of text that looked a bit like ASCII art:
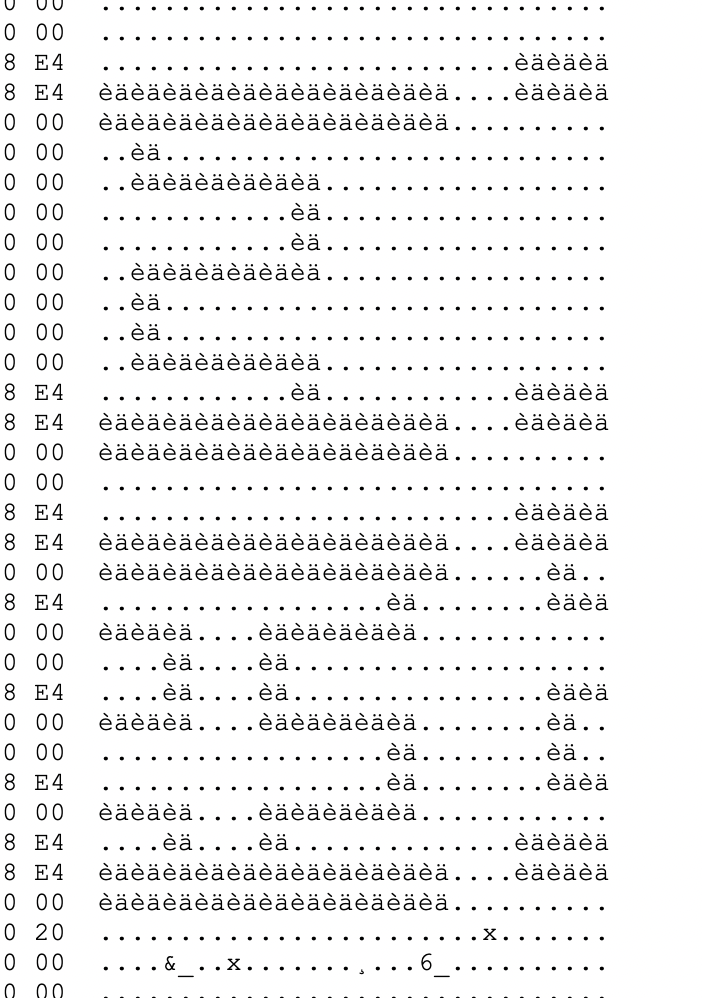
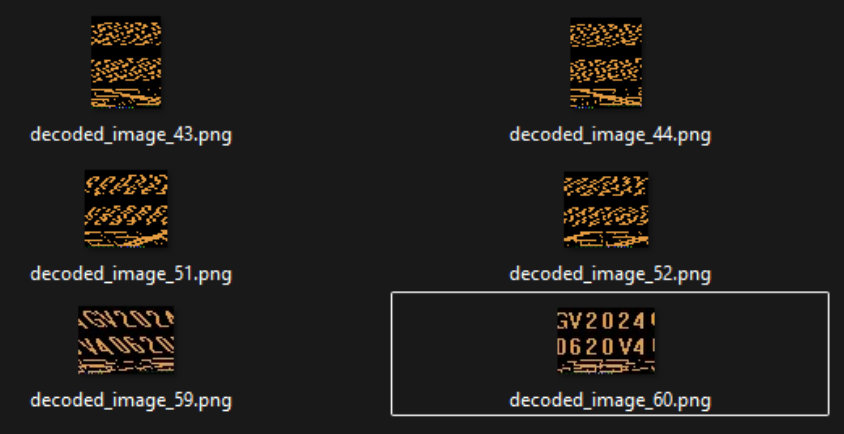
Doing some OSINT and finding research on similar vape device firmware, we made an educated guess and parsed these as though they were RGB565, an encoding mechanism to store RGB values in 2 bytes of data rather than 3 bytes. This is what we were able to decode as images:
Stable Stools and Proper Tools
After the conference, the team all bought their own vapes to hack on, but this time with proper tooling.
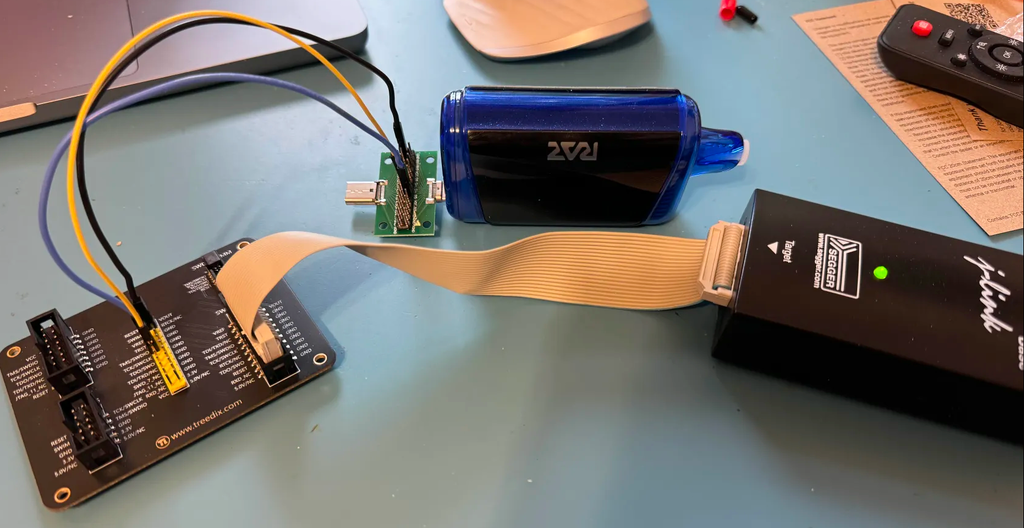
During the conference, we thought the battery was somehow preventing the connection to SWD by means of preventing the reset state. The proper tooling meant we finally learned the true reason: our hacked-together connection to the electronic ground was insufficient. In electronics, this is vital to ensure everything can “speak” the same voltage. This is why the above image shows an unmodified vape being debugged through a USB-C breakout board.
Continuing the OSINT, Praetorian reviewed the public reverse engineering research further and found that the previously linked blog post also links to a repository with tools the author wrote, as well as a link to a second hacker’s repository with in-depth information on the firmware and how to flash images. Both of these are for the older models of Raz vapes, and while there is likely overlap, Praetorian noted they do not document how this specific vape works. The tools provided do not work with this vape either, likely due to differences in firmware.
Our goal shifted throughout the teardown and reverse engineering process, starting with “Can we deliver malware with the vape?” and ending on “Can we upload our own images, or even create simple interactive games?”
Conclusion
What started as curiosity about a vape’s USB-C port at a hotel bar turned into an impromptu hardware hacking session demonstrating both the challenges and rewards of IoT reverse engineering. Praetorian’s team successfully reverse engineered a Raz DC25000 vape using makeshift tools, discovering that while the device couldn’t deliver malware as initially theorized, it was still hackable through the USB-C connection using Serial Wire Debug (SWD).
Does your company, vape manufacturer or not, have their own hardware product that needs creative and thorough testing of the security model? Contact Praetorian for more information on how we can help you uncover material risk and improve the security of your products.